

Want to become a Programmer part 4

Grzegorz Wolfinger
1. Welcome back my programmers !
After a few weeks of break from blogging, I decided that there is finally time to continue with my story. Don't get me wrong, I didn't stop coding or working on my projects, I just where so busy with that, that I couldn't find time for nothing more.
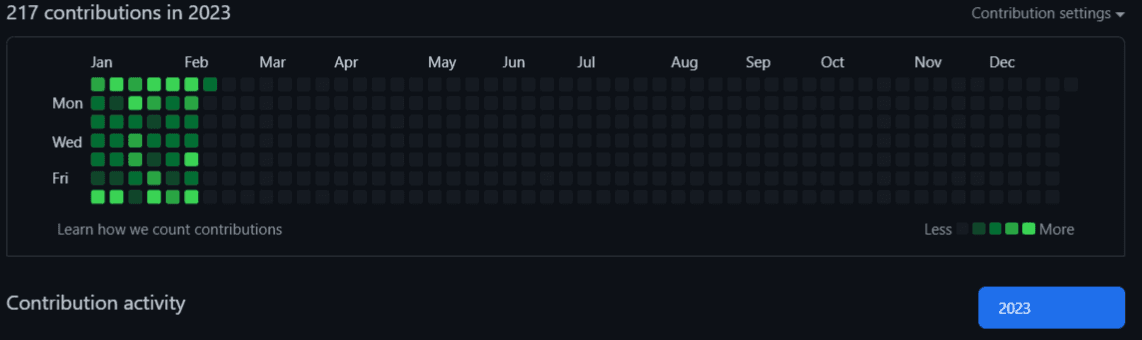
My GitHub activity since the beginning of 2023
I almost finished building Wolfpad 2.0. The main core it's up and running, there is one or two things left, that needs to be done. New CSS layout is applied and most of responsive design is completed. Project become massive, and there is still a lot of work that's need to be done , by adding new features, the whole process of registering new client and paid plans.
You can find all of that on my GitHub repository here
I decided that I will not share every single file with you guys, you can check that on my GitHub repo if you interested. What I would do instead, is that I will take some main features of my application or problems that I stumbled upon and showcase it. We will learn much more from that. So, let's not waste any more time and let's begin.
2. Choosing the right Tech Stack and why is so important.
I need to point this one more time , but this is really important, to understand, that before we even start to write some code, we need to decide, what tools will use for your project.
In this project, we used Next.JS with Typescript and I think there is no better Tech Stack to start a new project nowadays. Throughout this project, Typescript has been very helpful with catching all the errors. Sometimes it took me longer to figure it out the right type, it frustrated me a bit, but at the end it was worth it.
3. Using the power of AI - ChatGTP3
If we like it or not, AI will become a part of our every day life. Sooner or later we need to learn how to unlock its full potential. So I decided to start using it sooner, despite the fact that this is still a paid model.
Even if my project was technically 90% of JavaScript, it needed to look good, right, so I decided, that I will spend more time for CSS, to make it looks prettier.
With more styles comes more images like one of my superhero used to say.

I don't know how about you, but I don't like to waste time, for looking for cool pictures over the internet , that I can later add to my project. Thanks to AI we can generate them. Most of the images I used for creating Wolfpad was actually generated by AI. How cool is that right!
One of the coolest features, that I want to implement into Wolfpad, is an AI Tutor. It will be a paid feature, and it'll be using a current generation of ChatGPT3.
Wolfpad is an interactive coding environment. The way, that was designed, is that it's able to understand and write JavaScript, to be more specific - React.js.
So having a possibility to add a cell with a coding editor, and next to it adding a cell with AI Tutor it's not a bad idea.
4. Animations - Framer Motion
In today modern web application, nice effect and presentation is important, so adding right animation is a must. With help coming JavaScript library, that's doing only this, adding breathtaking animation to our web application.
Beneath you can find all the motion animation function that I used in Wolfpad.
//  motion.ts

import { Variants } from 'framer-motion';

export const navVariants = {
  hidden: {
    opacity: 0,
    y: -50,
    transition: {
      type: 'spring',
      stiffness: 300,
      damping: 140,
    },
  },
  show: {
    opacity: 1,
    y: 0,
    transition: {
      type: 'spring',
      stiffness: 80,
      delay: 0.7,
    },
  },
};

export const staggerContainer = {
  hidden: {},
  show: {
    transition: {
      staggerChildren: 0.5,
      delayChildren: 0.5,
    },
  },
} as Variants;

export const textTitleVariant = (delay: number) => ({
  hidden: {
    y: 50,
    opacity: 0,
  },
  show: {
    y: 0,
    opacity: 1,
    transition: {
      type: 'spring',
      duration: 1.25,
      delay,
    },
  },
});

export const textContainer = {
  hidden: {
    opacity: 0,
  },
  show: (i = 1) => ({
    opacity: 1,
    transition: { staggerChildren: 0.04, delayChildren: i * 0.04 },
  }),
};

export const titleTextContainer = {
  hidden: {
    opacity: 0,
  },
  show: (i = 1) => ({
    opacity: 1,
    transition: { staggerChildren: 0.1, delayChildren: i * 0.1 },
  }),
};

export const textVariant = {
  hidden: {
    opacity: 0,
    y: 20,
  },
  show: {
    opacity: 1,
    y: 0,
    transition: {
      type: 'tween',
      ease: 'easeIn',
    },
  },
};

export const fadeIn = (
  direction: string,
  type: string,
  delay: number,
  duration: number
) => ({
  hidden: {
    x: direction === 'left' ? 100 : direction === 'right' ? -100 : 0,
    y: direction === 'up' ? 100 : direction === 'down' ? -100 : 0,
    opacity: 0,
  },
  show: {
    x: 0,
    y: 0,
    opacity: 1,
    transition: {
      type,
      delay,
      duration,
      ease: 'easeOut',
    },
  },
});

export const zoomIn = (delay: number, duration: number) => ({
  hidden: {
    scale: 0,
    opacity: 0,
  },
  show: {
    scale: 1,
    opacity: 1,
    transition: {
      type: 'tween',
      delay,
      duration,
      ease: 'easeOut',
    },
  },
});

export const slideIn = (
  direction: string,
  type: string,
  delay: number,
  duration: number
) => ({
  hidden: {
    x: direction === 'left' ? '-150%' : direction === 'right' ? '100%' : 0,
    y: direction === 'up' ? '100%' : direction === 'down' ? '100%' : 0,
  },
  show: {
    x: 0,
    y: 0,
    transition: {
      type,
      delay,
      duration,
      ease: 'easeOut',
    },
  },
});

export const titleVariants = (direction: string, rotate = 0) => ({
  hidden: {
    x: direction === 'left' ? '-100%' : '100%',
    rotate: 120,
  },
  show: {
    x: 0,
    rotate: rotate,
    transition: {
      type: 'spring',
      duration: 1.8,
      delay: 0.5,
    },
  },
});

export const footerVariants = {
  hidden: {
    opacity: 0,
    y: 50,
    transition: {
      type: 'spring',
      stiffness: 300,
      damping: 140,
    },
  },
  show: {
    opacity: 1,
    y: 0,
    transition: {
      type: 'spring',
      stiffness: 80,
      delay: 0.5,
    },
  },
};
This is an example of animation that I implemented in Hero section. The rest kind of look very similar except that, I'm using different motion functions.
// Hero.tsx

import styles from './Hero.module.css';

import { motion } from 'framer-motion';
import { staggerContainer, textTitleVariant, slideIn } from '../utils/motion';

const Hero = () => {
  return (
    <section className={styles.hero_wrapper}>
      <motion.div
        variants={staggerContainer}
        initial="hidden"
        whileInView="show"
        viewport={{ once: false, amount: 0.25 }}
        className={styles.hero_container}
      >
        <div className={styles.hero_title}>
          <motion.h1 variants={textTitleVariant(1.1)}>Wolfpad</motion.h1>

          <motion.h2 variants={textTitleVariant(1.2)}>
            Interactive Coding Enviorment
          </motion.h2>
        </div>
        <motion.div
          variants={slideIn('left', 'tween', 0.3, 1)}
          className={styles.image_motion}
        >
          <div className={`${styles.image_container} submenu-gradient`} />
          <img src="/images/chatpc.png" alt="code" className={styles.image} />
        </motion.div>
      </motion.div>
    </section>
  );
};

export default Hero;
5. Redux/Toolkit - My answer to managing the state of my application
On my original Wolfpad 1.3 version, I used Redux to managing the state. This time I decided I will update it, and I'll use Redux/Toolkit. The whole process was a little of a challenge, but thanks to the very good documentation that folks from Redux provided, I have done it.
Inside my project, you can find a state folder which is where all the Redux logic are currently is.
First inside actions folder I created index.ts file with all interfaces I'll need later.
// index.ts

import { Cell, CellTypes } from '../cell';

export type Direction = 'up' | 'down';

export interface MoveCellAction {
  id: string;
  direction: Direction;
}

export interface InsertCellAfterAction {
  id: string | null;
  type: CellTypes;
}

export interface UpdateCellAction {
  id: string;
  content: string;
}

export interface BundleStartAction {
  cellId: string;
}

export interface BundleCompleteAction {
  cellId: string;
  bundle: {
    code: string;
    err: string;
  };
}

export interface FetchCellsCompleteAction {
  payload: Cell[];
}

export interface FetchCellsErrorAction {
  payload: string;
}

export interface SaveCellsErrorAction {
  payload: string;
}
Also, inside a state folder I created cell.ts file:
// cell.ts

export type CellTypes = 'code' | 'text' | 'chatbot' | 'draw';

export interface Cell {
  id: string;
  type: CellTypes;
  content: string;
}
Then, I created slices folder which holding a different slice, each for a different part of my application.
// cellsSlice.ts

import { createSlice, PayloadAction, nanoid } from '@reduxjs/toolkit';
import { Cell } from '../cell';
import {
  SaveCellsErrorAction,
  FetchCellsCompleteAction,
  FetchCellsErrorAction,
  UpdateCellAction,
  MoveCellAction,
  InsertCellAfterAction,
} from '../actions';

interface CellsState {
  loading: boolean;
  error: string | null;
  order: string[];
  data: {
    [key: string]: Cell;
  };
}

const initialState: CellsState = {
  loading: false,
  error: null,
  order: [],
  data: {},
};

const cellsSlice = createSlice({
  name: 'cell',
  initialState,
  reducers: {
    saveCellsError(
      state: CellsState,
      { payload: { payload } }: PayloadAction<SaveCellsErrorAction>
    ) {
      state.error = payload;
    },
    fetchCellsStart(state: CellsState) {
      state.loading = true;
      state.error = null;
    },
    fetchCellsComplete(
      state: CellsState,
      { payload: { payload } }: PayloadAction<FetchCellsCompleteAction>
    ) {
      state.order = payload.map((cell) => cell.id);

      state.data = payload.reduce((acc, cell) => {
        acc[cell.id] = cell;
        return acc;
      }, {} as CellsState['data']);
    },
    fetchCellsError(
      state: CellsState,
      { payload: { payload } }: PayloadAction<FetchCellsErrorAction>
    ) {
      state.loading = false;
      state.error = payload;
    },
    updateCell(
      state: CellsState,
      { payload }: PayloadAction<UpdateCellAction>
    ) {
      const { id, content } = payload;

      state.data[id].content = content;
    },
    deleteCell(state: CellsState, { payload }: PayloadAction<string>) {
      delete state.data[payload];
      state.order = state.order.filter((id) => id !== payload);
    },
    moveCell(state: CellsState, { payload }: PayloadAction<MoveCellAction>) {
      const { direction } = payload;
      const index = state.order.findIndex((id) => id === payload.id);
      const targetIndex = direction === 'up' ? index - 1 : index + 1;

      if (targetIndex < 0 || targetIndex > state.order.length - 1) {
        return state;
      }
      state.order[index] = state.order[targetIndex];
      state.order[targetIndex] = payload.id;
    },
    insertCellAfter(
      state: CellsState,
      { payload }: PayloadAction<InsertCellAfterAction>
    ) {
      const cell: Cell = {
        content: '',
        type: payload.type,
        id: nanoid(),
      };

      state.data[cell.id] = cell;

      const foundIndex = state.order.findIndex((id) => id === payload.id);

      if (foundIndex < 0) {
        state.order.unshift(cell.id);
      } else {
        state.order.splice(foundIndex + 1, 0, cell.id);
      }
    },
  },
});

export const {
  saveCellsError,
  fetchCellsStart,
  fetchCellsComplete,
  fetchCellsError,
  updateCell,
  moveCell,
  insertCellAfter,
  deleteCell,
} = cellsSlice.actions;

export const cellsReducer = cellsSlice.reducer;
// bundlesSlice.ts

import { createSlice, PayloadAction } from '@reduxjs/toolkit';
import { BundleStartAction, BundleCompleteAction } from '../actions';

interface BundlesState {
  [key: string]:
    | {
        loading: boolean;
        code: string;
        err: string;
      }
    | undefined;
}

const initialState: BundlesState = {};

const bundlesSlice = createSlice({
  name: 'bundle',
  initialState,
  reducers: {
    bundleStart(
      state: BundlesState,
      { payload }: PayloadAction<BundleStartAction>
    ) {
      state[payload.cellId] = {
        loading: true,
        code: '',
        err: '',
      };
    },
    bundleComplete(
      state: BundlesState,
      { payload }: PayloadAction<BundleCompleteAction>
    ) {
      state[payload.cellId] = {
        loading: false,
        code: payload.bundle.code,
        err: payload.bundle.err,
      };
    },
  },
});

export const { bundleStart, bundleComplete } = bundlesSlice.actions;

export const bundlesReducer = bundlesSlice.reducer;
// modalsSlice.ts

import { createSlice } from '@reduxjs/toolkit';

interface SideModalState {
  isMenuOpen: boolean;
}

const initialState: SideModalState = {
  isMenuOpen: false,
};

const modalsSlice = createSlice({
  name: 'modal',
  initialState,
  reducers: {
    openSideMenu(state: SideModalState) {
      state.isMenuOpen = true;
    },
    closeSideMenu(state: SideModalState) {
      state.isMenuOpen = false;
    },
  },
});

export const { openSideMenu, closeSideMenu } = modalsSlice.actions;

export const modalsReducer = modalsSlice.reducer;
Redux/Toolkit is actually really nice and easy to use it. Last thing to do it's to connect all the pieces together inside index.ts file in main state folder.
// index.ts

import { configureStore } from '@reduxjs/toolkit';
import {
  bundlesReducer,
  bundleStart,
  bundleComplete,
} from './slices/bundlesSlice';
import {
  cellsReducer,
  insertCellAfter,
  deleteCell,
  updateCell,
  moveCell,
} from './slices/cellsSlice';
import {
  modalsReducer,
  openSideMenu,
  closeSideMenu,
} from './slices/modalsSlice';
import { createBundle } from './apiCalls';

export const store = configureStore({
  reducer: {
    bundles: bundlesReducer,
    cells: cellsReducer,
    modals: modalsReducer,
  },
});

export type RootState = ReturnType<typeof store.getState>;
export type AppDispatch = typeof store.dispatch;

export const actionCreators = {
  bundleStart,
  bundleComplete,
  insertCellAfter,
  deleteCell,
  updateCell,
  moveCell,
  createBundle,
  openSideMenu,
  closeSideMenu,
};
Let's not forget to connect Redux to React part of my application.
// _app.tsx

import type { AppProps } from 'next/app';
import { Provider } from 'react-redux';
import { store } from '../state';
import Layout from '../components/Layout/Layout';

export default function App({ Component, pageProps }: AppProps) {
  return (
    <Provider store={store}>
      <Layout>
        <Component {...pageProps} />
      </Layout>
    </Provider>
  );
}
6. Custom hooks - makes life easier.
Custom hooks in React are a great way to reuse logic and state across components. Writing our own custom hooks allows us to create powerful, reusable functions that can be used in any component, making our code more efficient and easier to maintain.
Going this direction my application needed few hooks, so they there are.
// useActions.ts

import { useDispatch } from 'react-redux';
import { bindActionCreators } from '@reduxjs/toolkit';
import { actionCreators } from '../state';
import { useMemo } from 'react';

export const useActions = () => {
  const dispatch = useDispatch();

  return useMemo(() => {
    return bindActionCreators(actionCreators, dispatch);
  }, [dispatch]);
};
// useTypedSelector

import { useSelector, TypedUseSelectorHook } from 'react-redux';
import { RootState } from '../state';

export const useTypedSelector: TypedUseSelectorHook<RootState> = useSelector;
//useCumulativeCode.ts

import { useTypedSelector } from './useTypedSelector';

export const useCumulativeCode = (cellId: string) => {
  return useTypedSelector((state) => {
    const { data, order } = state.cells;
    const orderedCells = order.map((id) => data[id]);

    const showFunc = `
    import _React from 'react';
    import _ReactDOM from 'react-dom/client';
    var show = (value) => {
      const root = document.querySelector('#root');

      if (typeof value === 'object') {
        if (value.$$typeof && value.props) {
          _ReactDOM.createRoot(root).render(value);
        } else {
          root.innerHTML = JSON.stringify(value);
        }
      } else {
        root.innerHTML = value;
      }
    };
  `;

    const showFuncNoop = 'var show = () => {}';

    const cumulativeCode = [];

    for (let c of orderedCells) {
      if (c.type === 'code') {
        if (c.id === cellId) {
          cumulativeCode.push(showFunc);
        } else {
          cumulativeCode.push(showFuncNoop);
        }
        cumulativeCode.push(c.content);
      }

      if (c.id === cellId) {
        break;
      }
    }
    return cumulativeCode;
  }).join('\n');
};
7. Next.js - custom 404 Page.
Next.js is a powerful framework for creating custom 404 pages. It provides an easy-to-use API that allows developers to create custom 404 pages with dynamic content, such as images, videos, and text. This makes it possible to create unique and engaging experiences for users when they encounter a page not found error.
Wolfpad also got custom 404 Page, first I created CustomError component:
// CustomError.tsx

const CustomError = () => {
  return (
    <div className="error_page">
      <Image
        src="/images/inprogress.png"
        alt="coding"
        width={500}
        height={400}
      />
      <h2>
        This part of application is under construction or will never
        exist...{' '}
      </h2>
      <h2>Please come back later. Thank you</h2>

      <p>
        This project is made by Grzegorz Wolfinger | Next JS / React Developer
      </p>
    </div>
  );
};
export default CustomError;
Now let's create 404.tsx page and import CustomError component. Let's import dynamically, which can help to reduce the amount of data that needs to be sent over the network.
// 404.tsx
import dynamic from 'next/dynamic';
const DynamicCustomError = dynamic(
  () => import('../components/CustomError/CustomError'),
  {
    loading: () => (
      <div className="dynamic-loader">
        <h1>404....</h1>
      </div>
    ),
  }
);

const ErrorPage = () => {
  return <DynamicCustomError />;
};
export default ErrorPage;
7. What did I learn during the whole process of creating Wolfpad ?
I learned a lot during the process of creating Wolfpad. I learned how to use different features of Next.js and React, how to debug and troubleshoot code, and how to design a user interface. I also learned the importance of planning and organization when it comes to software development. Most importantly, I learned that creating an application is a long and difficult process that requires dedication and hard work. With each step of the process, I gained more knowledge and experience that will help me in future projects.
8. It's time to say goodbye.
The journey to becoming a programmer is an exciting one. It takes dedication, hard work, and a willingness to learn. But the rewards are worth it. I can create amazing things, solve complex problems, and make a difference in the world.
Now that I’ve become a programmer, the possibilities are endless. I can continue to hone my skills and explore new technologies. I can use my programming knowledge to build applications that make life easier for people around the world. Or I can use my skills to create something entirely new and innovative.
No matter what path I choose, becoming a programmer has opened up a world of opportunities for me. So I'll take this opportunity and make the most of it! Who knows what amazing things I’ll create next?
Thanks to all. This series come to the end. It was an amazing experience

Grzegorz Wolfinger | Next.js/React Developer If you found this blog helpful, and you want to support my work, you can: BuyMeACoffee