

Want to become a Programmer part 3

Grzegorz Wolfinger
1. My first interactive coding environment.
Welcome back. It's been some time since our last rendezvous with coding. Winter is coming at least in my part of the world where I live. So when is cold and gloomily outside, I like to sit in my chair with hot cup of coffee and tell some stories.
That's why in this part of the blog, I decided that I will share some story of how, I created my interactive coding environment. So I'll not only tell you why, I created this app, but I'll tell you, how I did it.
So I have an idea. Let's create this app again. This time let's use Next.js, originally I used React. This will be a good practice with coding, like always, let's add Typescript.
2. Long time ago ...
It was a winter, the January 1 of 2022, when I decided that I need to change my life. Yes, like almost 99% of our population, I had my New Year's resolutions.
I decided, that I will start to do, what I love the most, which is a coding. Back then I thought that, if I'll know how to create a simple website, this will give me a power to change and rule a world. Of course, it's a silly joke but a funny one. What I mean is that, I thought this is enough, to land a job in IT.
How do I actually start with the programming ?. I was looking for a remote work, because of the pandemic and I found one of those boot camps advertisements, saying that, they will teach me coding if I'll pay them a lot of money. You will probably know where this going, so instead of that, I decided to start learning myself.
Back then didn't know about Visual Studio Code, instead I used CodePen and that was my first contact with interactive coding environment. What I created back then, I thought was awesome, here is Greg First Website.
I didn't stop on that, for over 6 months Udemy.com was my home, where I started to learn JavaScript then React with Redux and finally Typescript. And then I started to work on my own version of interactive coding 'playground'.
3. Let's create Wolfpad 2.0.
Since then, I created fully functional and working Wolfpad which I published on NPM. Wolfpad ver.1.3.3. It's still a very early version and I have been working on adding new features.
Ok, so it's time to focus on project, let's start writing code.
Let's create a new project in Next.js with Typescript.
npx create-next-app@latest --typescript
I'll add a few dependencies, that we'll be needed it in this project.
npm install axios esbuild-wasm localforage wolfpad
Let's go quickly through our list of dependencies we just installed.
-
We need Axios because we'll be fetching some data from unpkg.com. For those that unfamiliar, unpkg is a fast, global content delivery network for everything on NPM. Use it to quickly and easily load any file from any package using a URL.
-
Esbuild is a next-generation JavaScript bundler aimed at improving build tool performance and ease of use. And some of its main features are: Extreme speed without needing a cache. ES6 and CommonJS modules.

-
In order to avoid big numbers of request to unpkg.com we will use localforage to filecache Local Forage Official Docs.
Now after cleaning a bit our starting template, let's think how we will structure this project.
In pages directories in index.tsx let's just create a dummy component.
// index.tsx

const HomePage = () => {
  return (
    <main
      style={{
        height: '100vh',
        display: 'flex',
        alignItems: 'center',
        justifyContent: 'center',
      }}
    >
      <div>
        <h1>Home Page</h1>

        <p>more coming soon...</p>
      </div>
    </main>
  );
};
export default HomePage;
For now let's not worry about CSS that much, so I'll do inline style. Eventually this will be a Home Page of ours application.
Inside pages folder, let's create wolfpad folder and inside, index.tsx file. I want to structure my application this way, so index.tsx will be my main page for wolfpad and maybe in a future, we'll add more content and more pages, like login page or register page.
Last but not least we need to find inside node_modules folder, esbuild-wasm folder and inside, a file esbuild.wasm, copy and paste it into public folder in root directory.
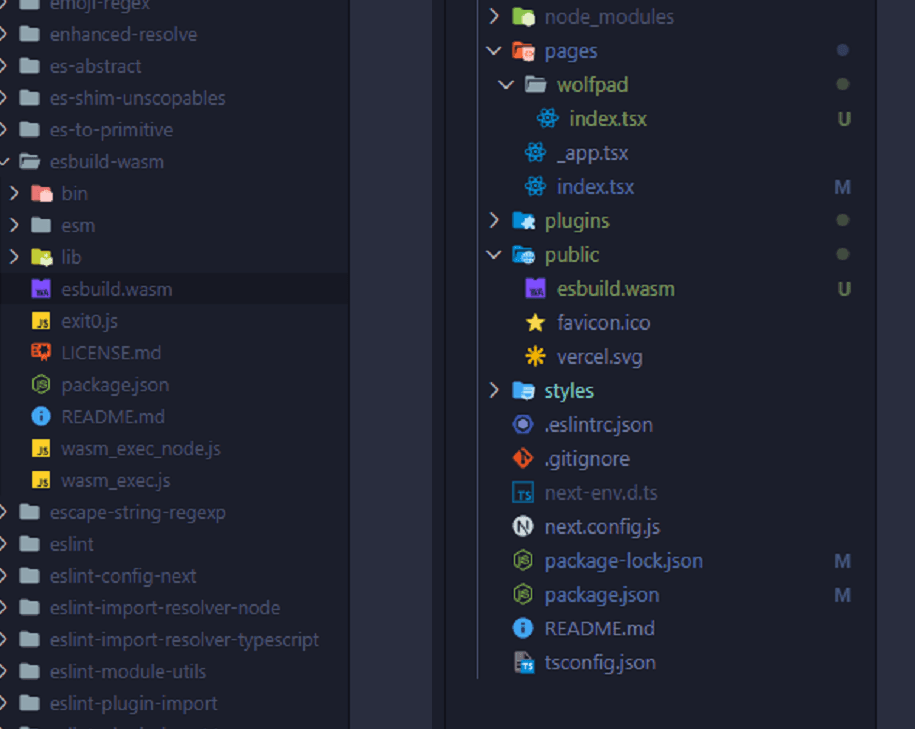
Inside pages/wolfpad/index.tsx, which is my main page for wolfpad, we will initialize esbuild. In order this to work in a browser, we need to pass to esbuild, options configuration object. Where we'll point to that esbuild.wasm file inside public folder.
At the top of this file, we imported useState, useEffect, useCallback so now inside useEffect we will call startService function to initialize esbuild. Let's do some check to make sure that we are calling this function only once, and useCallback will return a memoized version of the callback that only changes if one of the inputs has changed.
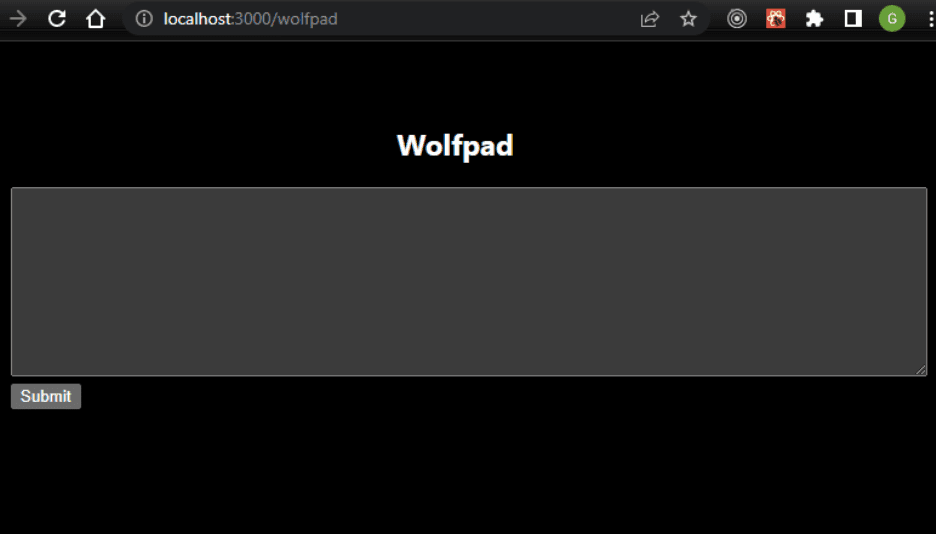
Let's create an input field, where user can write any imports or JavaScript code and then some field, where esbuild will bundle and show the results. I'll create components folder and then inside CodeInput, component.
In this onClickHandler function that we are passing as a props down the tree into CodeInput component, we'll do this whole bundle process.
This esbuild build function it returns a promise that either resolves with a "BuildResult" object or rejects with a "BuildFailure" object.
We need to pass this options object, where we can set entry points and plugins. My entryPoints will be an index.js.
Now let's create plugins folder and inside we need two plugins. One to handle relative paths in a module and second for fetching those modules.
import { useState, useEffect, useCallback } from 'react';
import * as esbuild from 'esbuild-wasm';
import CodeInput from '../../components/CodeInputs/CodeInput';
import { unpkgPathPlugin } from '../../plugins/unpkg-path-plugin';
import { fetchPlugin } from '../../plugins/fetch-plugin';

const PlaygroundPage = () => {
  const [input, setInput] = useState('');
  const [code, setCode] = useState('');
  const [initialized, setInitialized] = useState(false);

  const startService = useCallback(() => {
    if (initialized) {
      return;
    }

    try {
      esbuild.initialize({
        worker: true,
        wasmURL: '/esbuild.wasm',
      });
      setInitialized(true);
    } catch (error) {
      if (error instanceof Error) {
        console.log(error.message);
      } else {
        console.log(error);
      }
    }
  }, [initialized]);

  useEffect(() => {
    startService();
  }, [startService]);

  const onClickHandler = async () => {
    if (!initialized) {
      return;
    }
    try {
      const result = await esbuild.build({
        entryPoints: ['index.js'],
        bundle: true,
        write: false,
        plugins: [unpkgPathPlugin(), fetchPlugin(input)],
      });
      setCode(result.outputFiles[0].text);
    } catch (error) {
      if (error instanceof Error) {
        console.log(error.message);
      } else {
        console.log(error);
      }
    }
  };

  const onChange = (e: React.ChangeEvent<HTMLTextAreaElement>) => {
    setInput(e.target.value);
  };

  return (
    <CodeInput
      code={code}
      onClickHandler={onClickHandler}
      inputValue={input}
      onChange={onChange}
    />
  );
};
export default PlaygroundPage;
// CodeInput.tsx

type CodeProps = {
  code: string;
  inputValue: string;
  onClickHandler: () => void;
  onChange: (e: React.ChangeEvent<HTMLTextAreaElement>) => void;
};

const CodeInput = ({
  code,
  onClickHandler,
  inputValue,
  onChange,
}: CodeProps) => {
  return (
    <section style={{ padding: '3rem' }}>
      <div style={{ textAlign: 'center' }}>
        <h1>Wolfpad</h1>
      </div>
      <textarea
        style={{ width: '100%', height: '250px' }}
        value={inputValue}
        onChange={(e) => onChange(e)}
      />
      <div>
        <button onClick={onClickHandler}>Submit</button>
      </div>
      <pre>{code}</pre>
    </section>
  );
};
export default CodeInput;
// unpkg-path-plugin.ts

import * as esbuild from 'esbuild-wasm';

export const unpkgPathPlugin = () => {
  return {
    name: 'unpkg-path-plugin',
    setup(build: esbuild.PluginBuild) {
      // Handle root entry file of 'index.js'
      build.onResolve({ filter: /(^index\.js$)/ }, () => {
        return { path: 'index.js', namespace: 'a' };
      });

      //Handle relative paths in a module
      build.onResolve({ filter: /^\.+\// }, (args: any) => {
        return {
          namespace: 'a',
          path: new URL(args.path, `https://unpkg.com${args.resolveDir}/`).href,
        };
      });

      // Handle main file of a module
      build.onResolve({ filter: /.*/ }, async (args: any) => {
        return {
          namespace: 'a',
          path: `https://unpkg.com/${args.path}`,
        };
      });
    },
  };
};
// fetch-plugin.ts
import * as esbuild from 'esbuild-wasm';
import axios from 'axios';
import localforage from 'localforage';

const fileCache = localforage.createInstance({
  name: 'filecache',
});

export const fetchPlugin = (inputCode: string) => {
  return {
    name: 'fetch-plugin',
    setup(build: esbuild.PluginBuild) {
      build.onLoad({ filter: /.*/ }, async (args: any) => {
        if (args.path === 'index.js') {
          return {
            loader: 'jsx',
            contents: inputCode,
          };
        }

        const cachedResult = await fileCache.getItem<esbuild.OnLoadResult>(
          args.path
        );

        if (cachedResult) {
          return cachedResult;
        }

        const { data, request } = await axios.get(args.path);

        const result: esbuild.OnLoadResult = {
          loader: 'jsx',
          contents: data,
          resolveDir: new URL('./', request.responseURL).pathname,
        };

        await fileCache.setItem(args.path, result);

        return result;
      });
    },
  };
};
* So what is this esbuild plugin ?
According to the documentation, an esbuild plugin is an object with a name and a setup function. They are passed in an array to the build API call. The setup function is run once for each build API call you can find more on esbuild plugins here.
So now, we should be able to enter whatever imports in ours input field and this should be immediately invoked and fetched from unpkg.com.
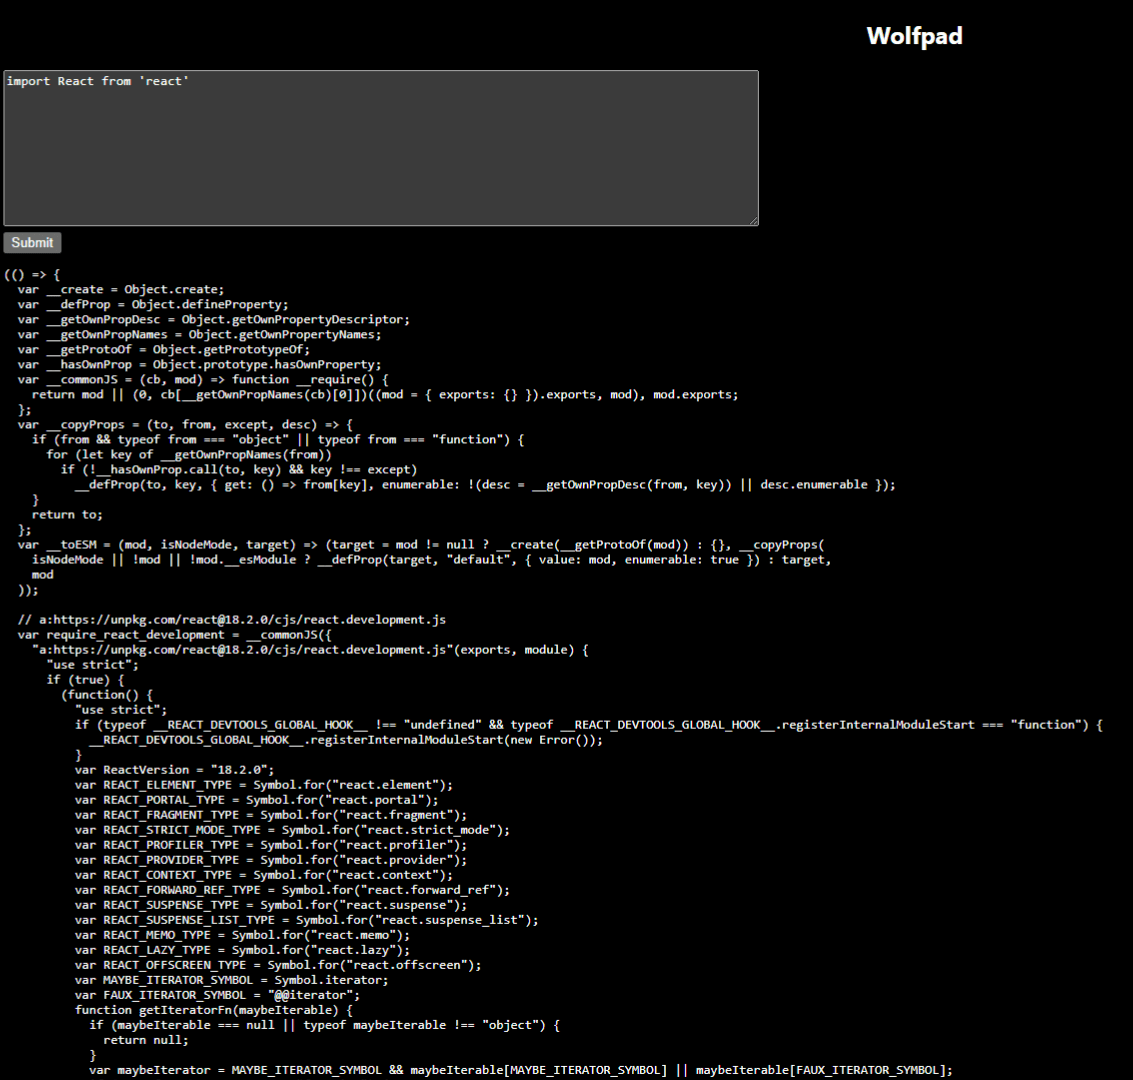
Nice, it's working and when I open my network tab I can also see, that my file-cache working as well. Now we need to see if we can imports not only JS files but also CSS files as well.
It will not be that easy, as we might think, well, it should work by basically changing loader to CSS, right now we're loading just jsx files. Unfortunately this approach will not work. Why, because esbuild working with the file system, and we are bundling user code in a browser, there is no file system in a browser. This will work 100% in a Node environment, but not in a browser. So we need to find a way, to tweak ours code and this is a solution and also small refactor to existing code.
// fetch-plugin.ts

import * as esbuild from 'esbuild-wasm';
import axios from 'axios';
import localforage from 'localforage';

const fileCache = localforage.createInstance({
  name: 'filecache',
});

export const fetchPlugin = (inputCode: string) => {
  return {
    name: 'fetch-plugin',
    setup(build: esbuild.PluginBuild) {
      build.onLoad({ filter: /(^index\.js$)/ }, () => {
        return {
          loader: 'jsx',
          contents: inputCode,
        };
      });

      build.onLoad({ filter: /.css$/ }, async (args: any) => {
        const cachedResult = await fileCache.getItem<esbuild.OnLoadResult>(
          args.path
        );

        if (cachedResult) {
          return cachedResult;
        }

        const { data, request } = await axios.get(args.path);

        const escaped = data
          .replace(/\n/g, '')
          .replace(/"/g, '\\"')
          .replace(/'/g, "\\'");

        const contents = `
        const style = document.createElement("style");
        style.innerText = '${escaped}';
        document.head.appendChild(style);

        `;

        const result: esbuild.OnLoadResult = {
          loader: 'jsx',
          contents,
          resolveDir: new URL('./', request.responseURL).pathname,
        };

        await fileCache.setItem(args.path, result);

        return result;
      });

      build.onLoad({ filter: /.*/ }, async (args: any) => {
        const cachedResult = await fileCache.getItem<esbuild.OnLoadResult>(
          args.path
        );

        if (cachedResult) {
          return cachedResult;
        }

        const { data, request } = await axios.get(args.path);

        const result: esbuild.OnLoadResult = {
          loader: 'jsx',
          contents: data,
          resolveDir: new URL('./', request.responseURL).pathname,
        };

        await fileCache.setItem(args.path, result);

        return result;
      });
    },
  };
};
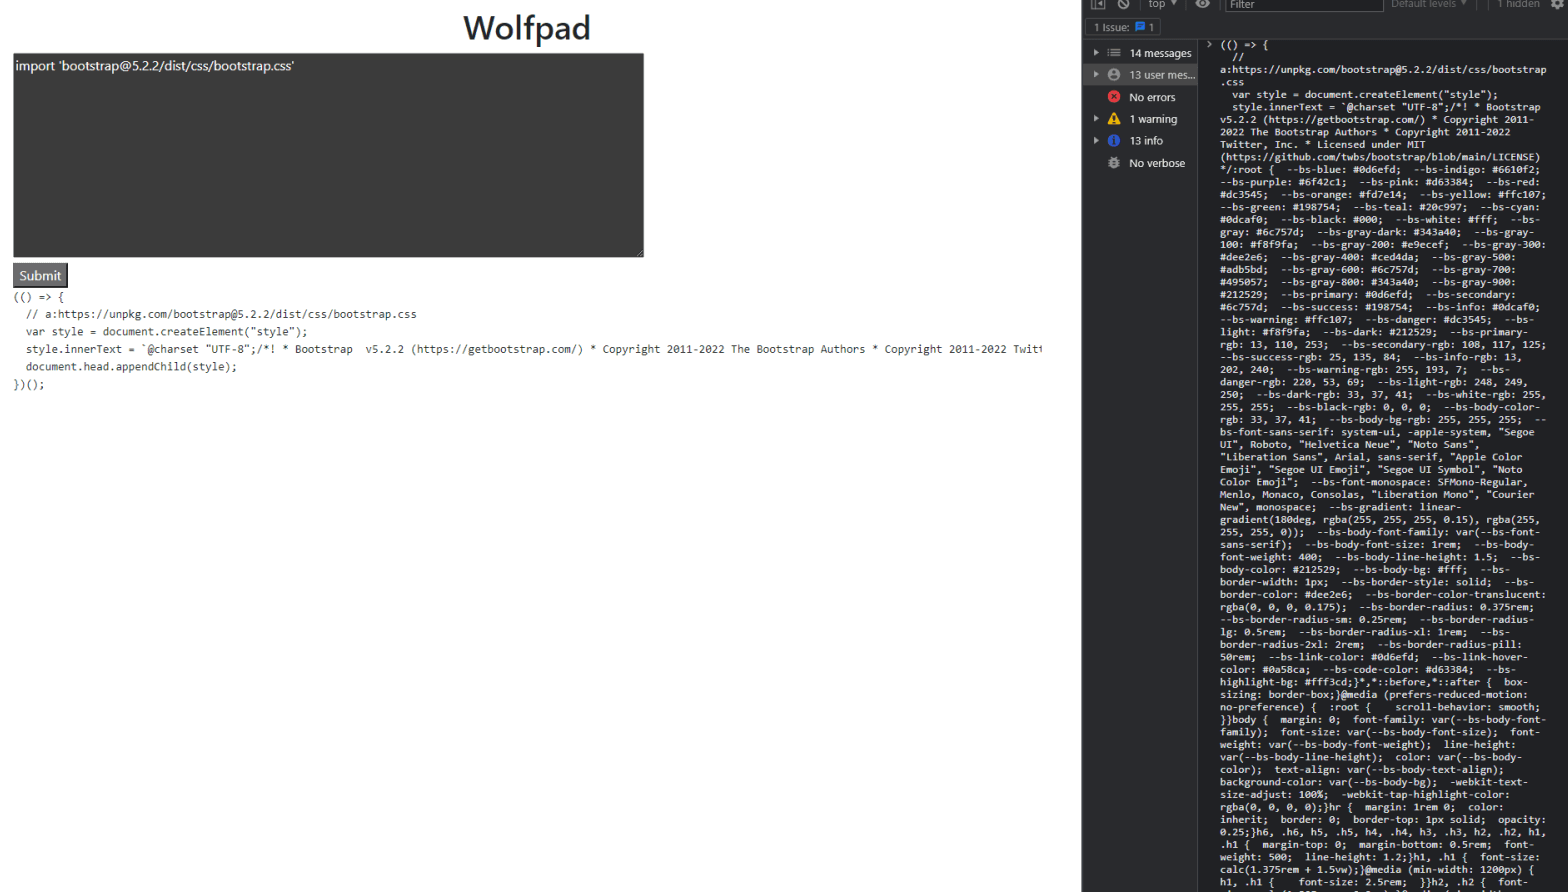
Let's see if this working, let's import CSS file.
import 'bootstrap@5.2.2/dist/css/bootstrap.css';
Nice, it's working, it's bundling css file and returning whatever is fetched from unpkg.com, also, when we copy the whole thing, and we paste it in to dev console, we can apply all CSS features into current HTML document.
Right now the code is working fine, but it doesn't look good, we have many repetitions. So let's fix this.
Let's refactor fetch-plugin.ts a bit.
// fetch-plugin.ts

import * as esbuild from 'esbuild-wasm';
import axios from 'axios';
import localforage from 'localforage';

const fileCache = localforage.createInstance({
  name: 'filecache',
});

export const fetchPlugin = (inputCode: string) => {
  return {
    name: 'fetch-plugin',
    setup(build: esbuild.PluginBuild) {
      build.onLoad({ filter: /(^index\.js$)/ }, () => {
        return {
          loader: 'jsx',
          contents: inputCode,
        };
      });

      build.onLoad({ filter: /.*/ }, async (args: any) => {
        const cachedResult = await fileCache.getItem<esbuild.OnLoadResult>(
          args.path
        );

        if (cachedResult) {
          return cachedResult;
        }
      });

      build.onLoad({ filter: /.css$/ }, async (args: any) => {
        const { data, request } = await axios.get(args.path);
        const escaped = data
          .replace(/\n/g, '')
          .replace(/"/g, '\\"')
          .replace(/'/g, "\\'");

        const contents = `
        const style = document.createElement("style");
        style.innerText = '${escaped}';
        document.head.appendChild(style);

        `;

        const result: esbuild.OnLoadResult = {
          loader: 'jsx',
          contents,
          resolveDir: new URL('./', request.responseURL).pathname,
        };

        await fileCache.setItem(args.path, result);

        return result;
      });

      build.onLoad({ filter: /.*/ }, async (args: any) => {
        const { data, request } = await axios.get(args.path);

        const result: esbuild.OnLoadResult = {
          loader: 'jsx',
          contents: data,
          resolveDir: new URL('./', request.responseURL).pathname,
        };

        await fileCache.setItem(args.path, result);

        return result;
      });
    },
  };
};
The last thing, I want to do is to remove esbuild.wasm file from public folder, the one we copied from node_modules/esbuild-wasm. Instead of that, we can now get this file directly from unpkg.com. Esbuild is a NPM module, so this shouldn't be a problem.
// index.tsx

const PlaygroundPage = () => {
  const [input, setInput] = useState('');
  const [code, setCode] = useState('');
  const [initialized, setInitialized] = useState(false);

  const startService = useCallback(() => {
    if (initialized) {
      return;
    }

    try {
      esbuild.initialize({
        worker: true,
        wasmURL: 'https://unpkg.com/esbuild-wasm@0.15.14/esbuild.wasm',
      });
      setInitialized(true);
    } catch (error) {
      if (error instanceof Error) {
        console.log(error.message);
      } else {
        console.log(error);
      }
    }
  }, [initialized]);

  // {...}
};
This is exactly the same file, so it shouldn't have a difference, except the money thing. Instead of us hosting this file in our app, let Unpkg.com pays all the hosting fees.
4. Code Execution inside a browser.
At this point in time, we have allowed a user, to write out some really advanced JavaScript syntax, like Async Await, JSX, stuff like that, and we are properly, transpiling it. We are also processing import statements for other JavaScript files, and we are getting these directly off of NPM. Users can also import stuff like CSS very easily.
So now we're going to start to talk about code execution inside the browser. We have to figure out, how to take the output of that bundle and execute it safely. So let's start work on adding that feature.
One very easy way that we can execute arbitrary JavaScript, that is contained inside a string, is by using the eval function, which is built into the browser. Unfortunately eval() is a dangerous function, which executes the code it's passed with the privileges of the caller. If you run eval() with a string that could be affected by a malicious party, you may end up running malicious code on the user's machine with the permissions of your webpage / extension.
There might eventually be a couple of different challenges we run into as we start to think about running a user's code.
Considerations Around Code Execution
- User-provided code might throw errors and cause our program to crash.
- User-provided code might mutate the DOM, causing our program to crash.
- A user might accidentally run code provided by another malicious user.
The solution, that's going to address all three of these huge problems, is HTML element - Iframe. We'll use Iframe to preview user code in separate window. Right now, we have the world of JavaScript for the parent document, our next.js app, and we've got the world of JavaScript running inside the Iframe. Now, depending upon some different configuration settings that we're going to apply to this Iframe, we can enable some amount of communication between these two different context, and to be more specific we'll disallow that communication.
Let's create Iframe element inside my CodeInput.tsx file. Our component, will receive iframeRef and code arguments as a props, that's why we need to add theirs types. We also need to add this sandbox property, so we can disallow this communication and only allow scripts to allow JavaScript execution. We then take HTML and provide it to the iFrame as it's srcDoc property to the contents of the iFrame.
// CodeInput.tsx

type CodeProps = {
  code: string;
  inputValue: string;
  onClickHandler: () => void;
  onChange: (e: React.ChangeEvent<HTMLTextAreaElement>) => void;
  iframeRef: React.LegacyRef<HTMLIFrameElement>;
};

const CodeInput = ({
  code,
  onClickHandler,
  inputValue,
  onChange,
  iframeRef,
}: CodeProps) => {
  return (
    <section style={{ padding: '3rem' }}>
      <div style={{ textAlign: 'center' }}>
        <h1>Wolfpad</h1>
      </div>
      <textarea
        style={{ width: '100%', height: '250px' }}
        value={inputValue}
        onChange={(e) => onChange(e)}
      />
      <div style={{ paddingBottom: '5px' }}>
        <button onClick={onClickHandler}>Submit</button>
      </div>

      <iframe
        title="preview"
        ref={iframeRef}
        sandbox="allow-scripts"
        srcDoc={code}
        width="100%"
      />
    </section>
  );
};
export default CodeInput;
Now inside of index.tsx file let's first import useRef. We're going to get a reference to our iframe, then whenever we do bundling process and get some new code out, whenever this bundling process is complete, we're going to take that reference to the iframe and use it to emit a message down into the iframe. We are going to communicate all of our bundled code through that post message thing. Let's create HTML and show kind of a skeleton of an HTML document. We're also going to write in a little of code inside there to start listening for events messages.
Once user submit his code, we're going to bundle that. Then we're going to emit an event down into our iframe. Our Iframe should receive that event. Then event should contain all of our code. So to execute this code, we're going to use eval function. That's going to cause that code to be executed, and we're going to see some result printed up.
// index.tsx

import { useState, useEffect, useCallback, useRef } from 'react';
import * as esbuild from 'esbuild-wasm';
import CodeInput from '../../components/CodeInputs/CodeInput';
import { unpkgPathPlugin } from '../../plugins/unpkg-path-plugin';
import { fetchPlugin } from '../../plugins/fetch-plugin';

const PlaygroundPage = () => {
  const [input, setInput] = useState('');
  const [initialized, setInitialized] = useState(false);
  const iframeRef = useRef<any>(null);

  const startService = useCallback(() => {
    if (initialized) {
      return;
    }

    try {
      esbuild.initialize({
        worker: true,
        wasmURL: 'https://unpkg.com/esbuild-wasm@0.15.14/esbuild.wasm',
      });
      setInitialized(true);
    } catch (error) {
      if (error instanceof Error) {
        console.log(error.message);
      } else {
        console.log(error);
      }
    }
  }, [initialized]);

  useEffect(() => {
    startService();
  }, [startService]);

  const onClickHandler = async () => {
    if (!initialized) {
      return;
    }

    // reseting the contents of the iframe
    iframeRef.current.srcdoc = html;

    try {
      const result = await esbuild.build({
        entryPoints: ['index.js'],
        bundle: true,
        write: false,
        plugins: [unpkgPathPlugin(), fetchPlugin(input)],
      });

      iframeRef.current.contentWindow.postMessage(
        result.outputFiles[0].text,
        '*'
      );
    } catch (error) {
      if (error instanceof Error) {
        console.log(error.message);
      } else {
        console.log(error);
      }
    }
  };

  const html = `
    <html>
      <head></head>
      <body>
        <div id="root"></div>
        <script>
          window.addEventListener('message', (event) => {
            try {
              eval(event.data)
            } catch(error) {
              const root = document.querySelector('#root');
              root.innerHTML = '<div style="color:red"><h4>Runtime Error</h4>' +  error + '</div>'
              console.error(error);
            }

          }, false);
        </script>
      </body>
    </html>
  `;

  const onChange = (e: React.ChangeEvent<HTMLTextAreaElement>) => {
    setInput(e.target.value);
  };

  return (
    <CodeInput
      code={html}
      onClickHandler={onClickHandler}
      inputValue={input}
      onChange={onChange}
      iframeRef={iframeRef}
    />
  );
};
export default PlaygroundPage;
Let's test if it works? I want to try to create a React component and then render it out. I want to display it inside our iframe. Remember inside that HTML snippet we had added in a div with ID root. That means we can create a React component in attempt to render it into that div right there. Let's also import some bootstrap CSS file.
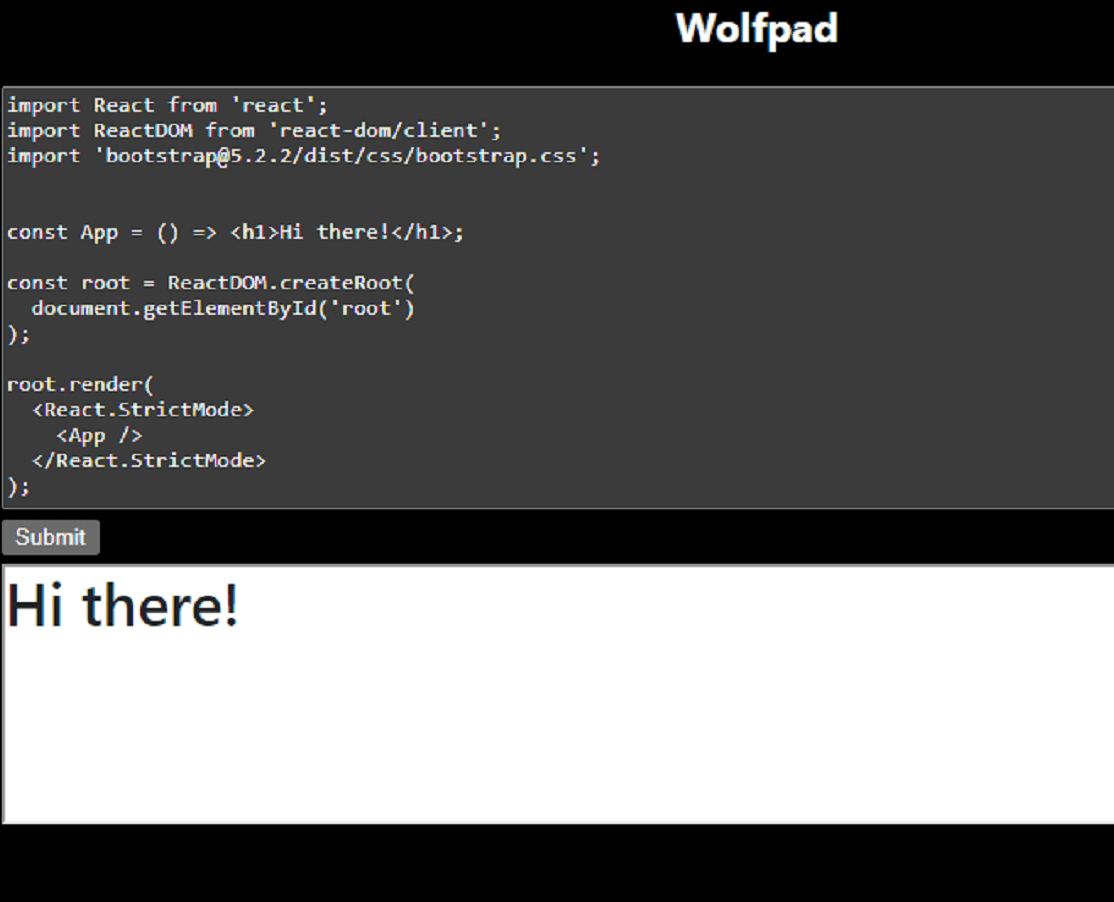
It works! We can create a real component, while loading up React and React DOM directly from unpkg.com. We're bundling our code inside the browser and seeing the result right down in our iframe. And what's more, all this runs rather quickly.
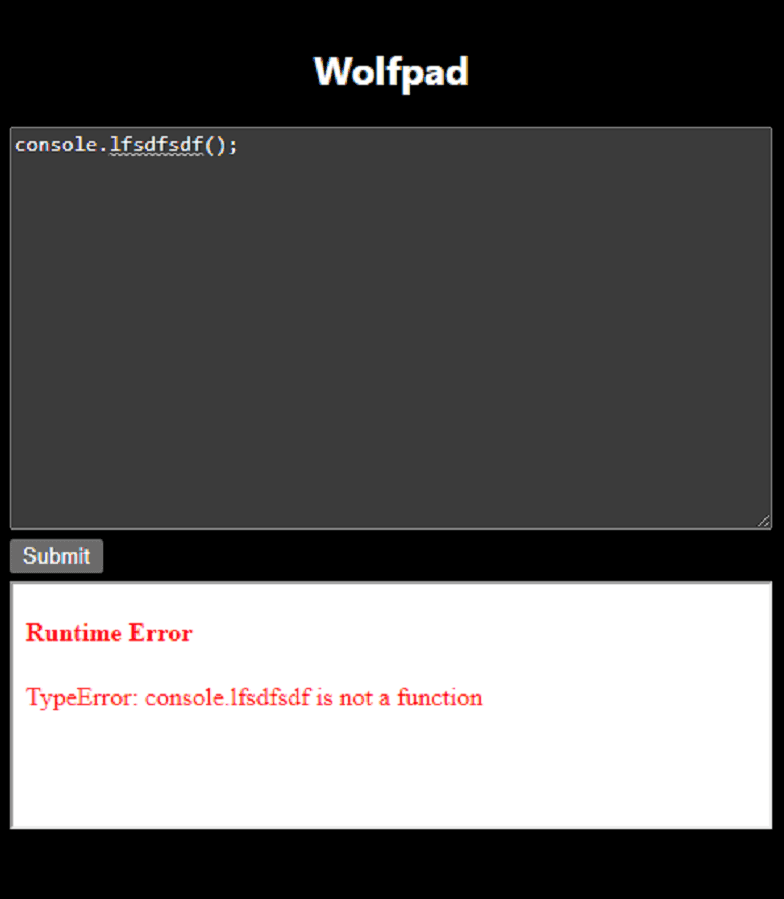
We also added some error handling in case, user will enter some invalid code, if that will happen, we will show error message to the user.
Summary
And that will be the end of this part of our series I want to become a programmer. In the next part I want to work on the next major feature inside our project, and that's going to be to replace our text editor which doesn't look great, with a real code editor. And more...
My name is Grzegorz Wolfinger, I want to become a programmer, but what I love the most is to create a cool stuff and learn a new thing about programming.
If you found this blog helpful, and you want to support my work, you can: BuyMeACoffee