

AWS - Introduction to Amazon Web Services

Grzegorz Wolfinger
Introduction:
AWS, or Amazon Web Services, is a comprehensive and highly scalable cloud computing platform provided by Amazon. It offers a wide range of cloud-based services that are designed to meet the ever-growing demands of businesses, developers, and individuals alike. With its robust infrastructure, AWS aims to provide flexible, reliable, and secure cloud solutions for various industries globally.
Key AWS Services:
1.Amazon EC2 (Elastic Compute Cloud):
- EC2 enables users to rent virtual servers in the cloud, providing scalable computing capacity. It allows businesses to quickly deploy and manage applications, providing complete control over computing resources.
2.Amazon S3 (Simple Storage Service):
- S3 is an object storage service that offers industry-leading scalability, durability, and security for storing and retrieving any volume of data from anywhere on the web. It is commonly used for backups, data archiving, and hosting static websites.
3.Amazon RDS (Relational Database Service):
- RDS simplifies the setup, operation, and scaling of a relational database management system in the cloud. It supports popular databases such as MySQL, PostgreSQL, and Oracle, providing high availability, durability, and automated backups.
4.AWS Lambda:
- Lambda is a serverless computing service that allows you to run your code without provisioning or managing servers. It lets you focus on writing the code and automatically scales with the number of incoming requests, helping you to build scalable and cost-effective applications.
5.Amazon DynamoDB:
- DynamoDB is a fully managed NoSQL database service that provides low-latency access to massive amounts of structured data. It offers seamless scalability, automatic replication across multiple regions, and consistent performance at any scale.
6.Amazon SNS (Simple Notification Service):
- SNS is a flexible, fully managed messaging service that enables sending notifications to individuals or groups via email, SMS, mobile push, or other supported protocols. It simplifies the process of sending notifications, monitoring delivery status, and managing targeted audiences.
7.Amazon CloudFront:
- CloudFront is a content delivery network (CDN) service that accelerates the delivery of your static and dynamic web content to end-users worldwide. It helps reduce latency, improves speed and user experience, and provides protection against malicious attacks. These are just a few examples of the wide range of services that AWS offers. With over 175 services available across various categories like compute, storage, databases, networking, machine learning, and analytics, AWS provides a comprehensive cloud platform that can meet diverse business needs.
EC2 Instances and How to create one:
Let's go straight to how to create an EC2 instance. First, you need an AWS account - AWS Free Tier
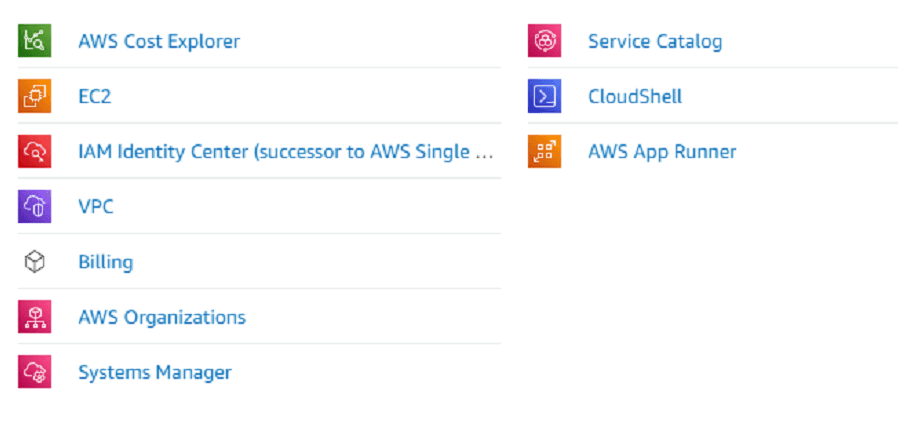
As soon as you create a new account, you will be redirected to the Console Home, where you can view all the services. Let's click on the EC2 service.
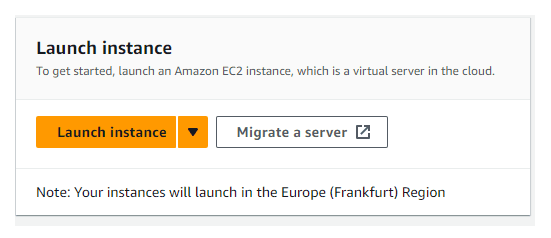
This will take you to the EC2 Dashboard where you can manage and monitor your EC2 instances, volumes, security groups, and other resources. It provides a user-friendly interface to launch new instances, configure networking, and perform various administrative tasks. From here let's launch a new instance:
Here, we will have access to a wide range of Amazon Machine Images (AMIs) to choose from. These AMIs are preconfigured with different operating systems and software applications, which makes it easy for you to start your instances with the desired configuration. Furthermore, we can configure various instance settings such as instance type, storage options, security groups, and key pairs. Additionally, we will have access to advanced options like instance placement, monitoring, and tagging, which help with better resource management and organization. This comprehensive dashboard provides a seamless and intuitive experience for launching and managing EC2 instances.
Let's go through the configuration of our instance step by step before launching.

First, we can name our instance. You can name it however you want. I'll go with My Node Server. It's pretty straightforward. Also, notice that you can add more additional tags. If you press the little Info icon, it will tell you the following:
Resource tags:
- A tag is a label that you assign to an AWS resource. Each tag consists of a key and an optional value, both of which you define.
- Key can be up to 128 Unicode characters in UTF-8
- Optional tag value can be up to 256 characters in UTF-8
Resource types
- The resource type on which the tag will be created when an instance is launched from the launch template.
- We got few options here: Instances, Volumes, Elastic Graphics, Spot instance requests, Network interfaces
Next, let's choose our AMI (Amazon Machine Image). By default, it is Amazon Linux AWS. You can find out more about what an AMI is by pressing the Info icon again. You will discover that an AMI contains the software configuration, including the operating system (OS), application server, and applications required to launch your instance.
I'll keep the default settings. Here, we have the option to choose from a few operating systems. I'll go with the latest Amazon Linux 2023 AMI, but feel free to explore. Just keep in mind to look only for Free tier eligible options. One thing to notice is that there are a few AWS tutorials out there where people were using Amazon Linux 2 AMI, and it also worked. Last but not the least chose the architecture, I'll go with 64-bit(x86).
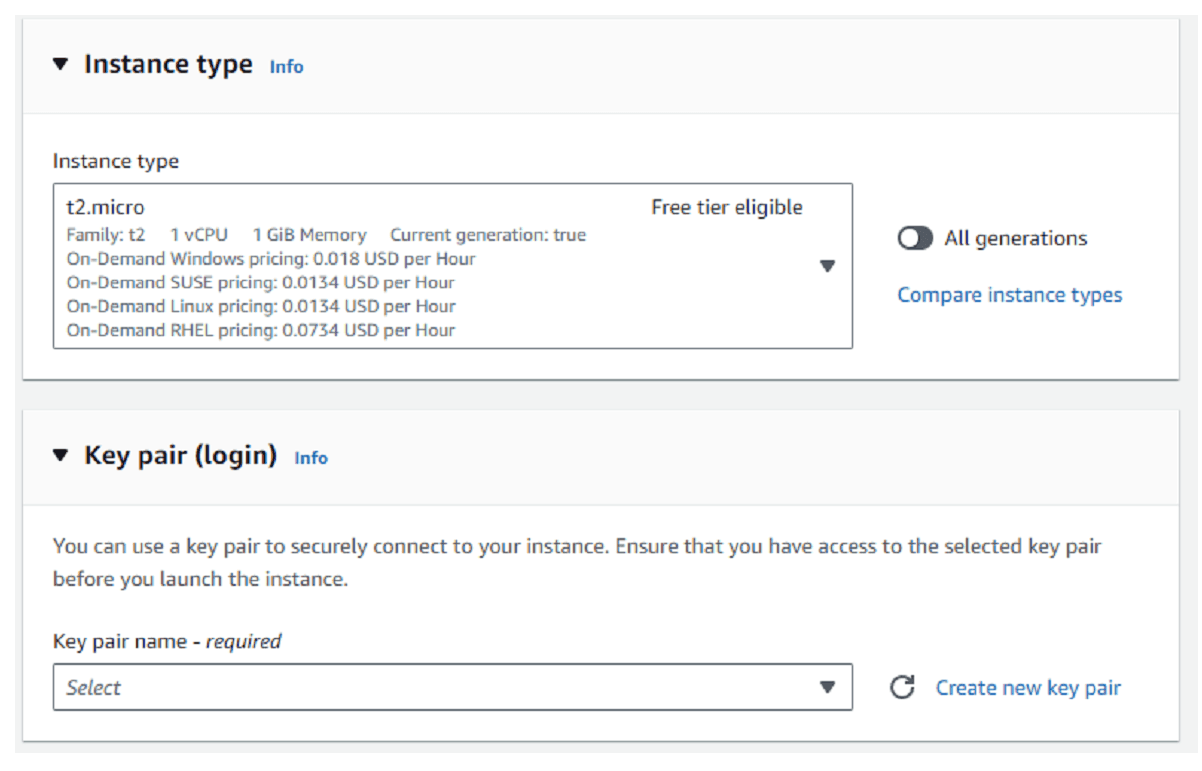
Next is the Instance type. Here, I'll also keep the default settings for t2.micro. It's part of the Free tier and since I'll be running a simple Node server on this instance, 1 CPU with 1GB Memory is enough for me. Feel free to explore and check every available option.
Key pair
Creating a new key pair before launching an instance is really important. Proceeding without a key pair is Not recommended, even if it's a default value. If you have created instances before, you might see some key pairs in the field, and you can use them if you want. However, I highly recommend creating a new key pair for better security and control. You can learn more here: Amazon EC2 key pairs
Let's continue and press Create new key pair link , which will open a new window.
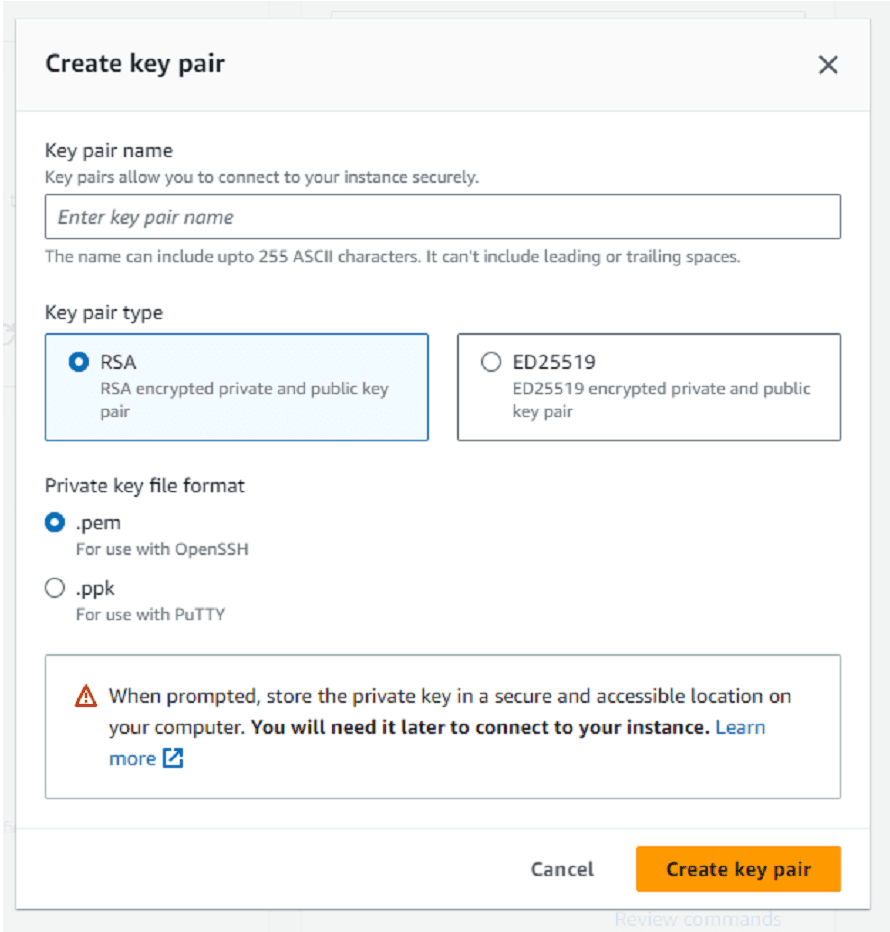
First, let's provide a key pair name , I'll go with node-server , then we need to choose a type. When creating an EC2 instance, you have the option to choose a key pair for secure SSH access. The two main types of key pair algorithms available are RSA and ED25519.
RSA or ED25519 algoritms ?? - Let's ask chatGPT5
RSA (Rivest, Shamir, Adleman) is one of the earliest and widely-used public-key cryptosystems. It is based on the mathematical properties of prime numbers. RSA key pairs consist of a private key, which should be kept secure and never shared, and a public key, which is used to encrypt messages and verify signatures.
ED25519 is a more recent algorithm based on elliptic curve cryptography. It offers strong security and higher performance compared to RSA. ED25519 key pairs are derived from a seed, and they also consist of a private key and a public key. They are specifically designed for digital signatures, making them efficient for SSH authentication.
In terms of security, both RSA and ED25519 are considered secure algorithms. However, ED25519 is generally considered more secure due to its shorter key length and stronger cryptographic properties. Additionally, the ED25519 algorithm has certain built-in protections against certain types of attacks that RSA lacks. Ultimately, the choice between RSA and ED25519 depends on compatibility and personal preference. If you have older systems or applications that only support RSA, then it may be a better choice. However, if compatibility is not a concern, ED25519 is generally recommended due to its superior security and performance characteristics.
As you can see, no matter what we choose here, it will be safe. I'll stick with the tried-and-true algorithm from my buddy Adleman - RSA, but you can go with either one. Regarding the key file format, I'll go with the .perm format, as I'm not a PuTTY user. However, if you use PuTTY, just go with the .ppk format. The choice of format is relevant because we can connect to our EC2 instance using SSH authentication, either from our EC2 Instance dashboard or from our local computer using our bash terminal or PuTTY. There is plenty of documentation available on how to set up the connection, and we will cover that here as well. Let's press the Create key pair button, and voilà! We have successfully created a key pair which was instantly downloaded into our machine. Now, we can select our key pair. In my case, the key pair is named node-server because that's what I named it.
The file that is downloaded when creating a new key pair is a backup of the private key. It is essential to keep this file safe because it is necessary for accessing and managing the associated EC2 instance. The private key is used for SSH (Secure Shell) authentication, allowing you to securely connect to your EC2 instance. If you lose the downloaded private key file or accidentally delete it, you will not be able to connect to your instance unless you have another backup or create a new key pair. Therefore, it is crucial to treat this downloaded file as a backup and store it securely in a location where it won't be lost or compromised. This way, you can ensure that you can access and manage your EC2 instance whenever needed.
Network settings
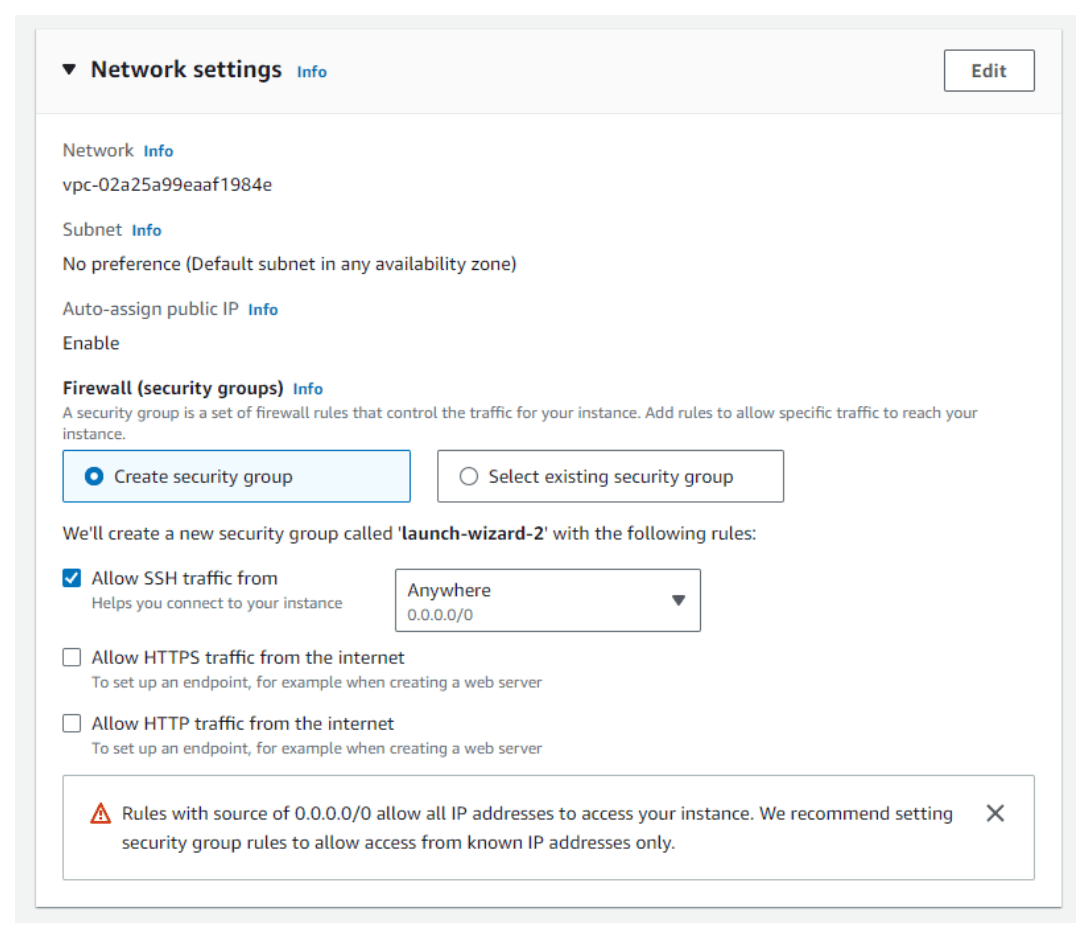
Here, we will keep everything by default. We want to create a security group that allows SSH traffic from anywhere. The only difference you may notice is the name of the group. In my case, it is launch-wizard-2 because it's the second security group I'm creating. By default, the name of the first security group is launch-wizard-1 and the number increments as you create more groups. You can edit the name if you wish, but for now, please don't make any other changes. We will add more rules later when we set up our server on the instance.
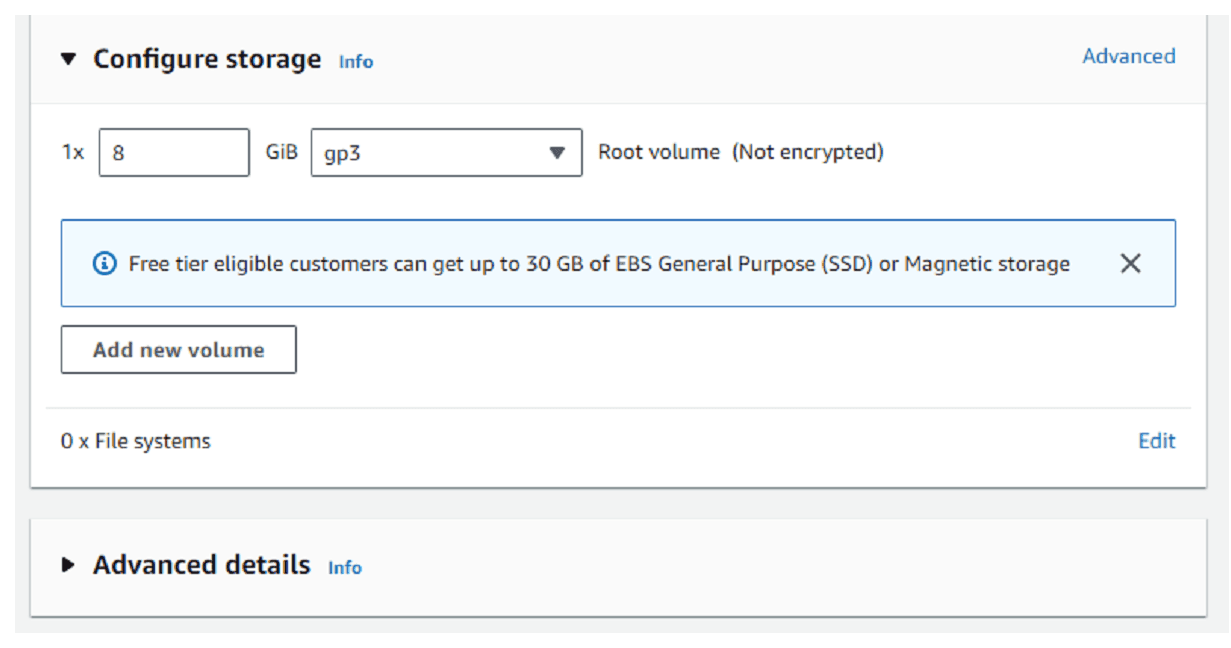
The last step is to configure the storage space, and once again, I recommend sticking with the default settings. It's important to note that every free tier eligible customer can receive up to 30 GB of EBS General Purpose (SSD) or Magnetic storage.
There are also advanced details that we will not touch on today, at least. All I can say is that when creating an EC2 instance on AWS, you have the option to configure advanced details to further customize your setup. This includes options like setting user data to automate instance configuration, enabling detailed monitoring for enhanced performance metrics, configuring instance shutdown behavior, and defining IAM roles for secure access management. Additionally, you can specify instance tags for easy identification and categorization, and allocate Elastic IP addresses for static public IP associations. These advanced details provide flexibility and control over your EC2 instance deployment on AWS. You can apply advanced detail changes to an EC2 instance even after it has been created. AWS allows you to modify various settings and configurations post-launch.
Finally, we can launch our instance by pressing Launch instance button. This should take a few seconds, and we can successfully initiate launch of instance

If you succeed, that's great! I'm happy for you. In the case of a failure, try checking the Launch log. It might contain error messages that can provide insights into the reason for the failure. Double-check your instance configuration settings to ensure that you have provided the correct values for options such as instance type, AMI, security groups, and key pairs. Sometimes a small mistake in these settings can lead to launch failures. Additionally, try repeating all the steps from the beginning of this tutorial. Maybe you missed something.
Now, we can go back to our EC2 Dashboard or directly to the Instances section, where we will be able to see our newly launched instance.
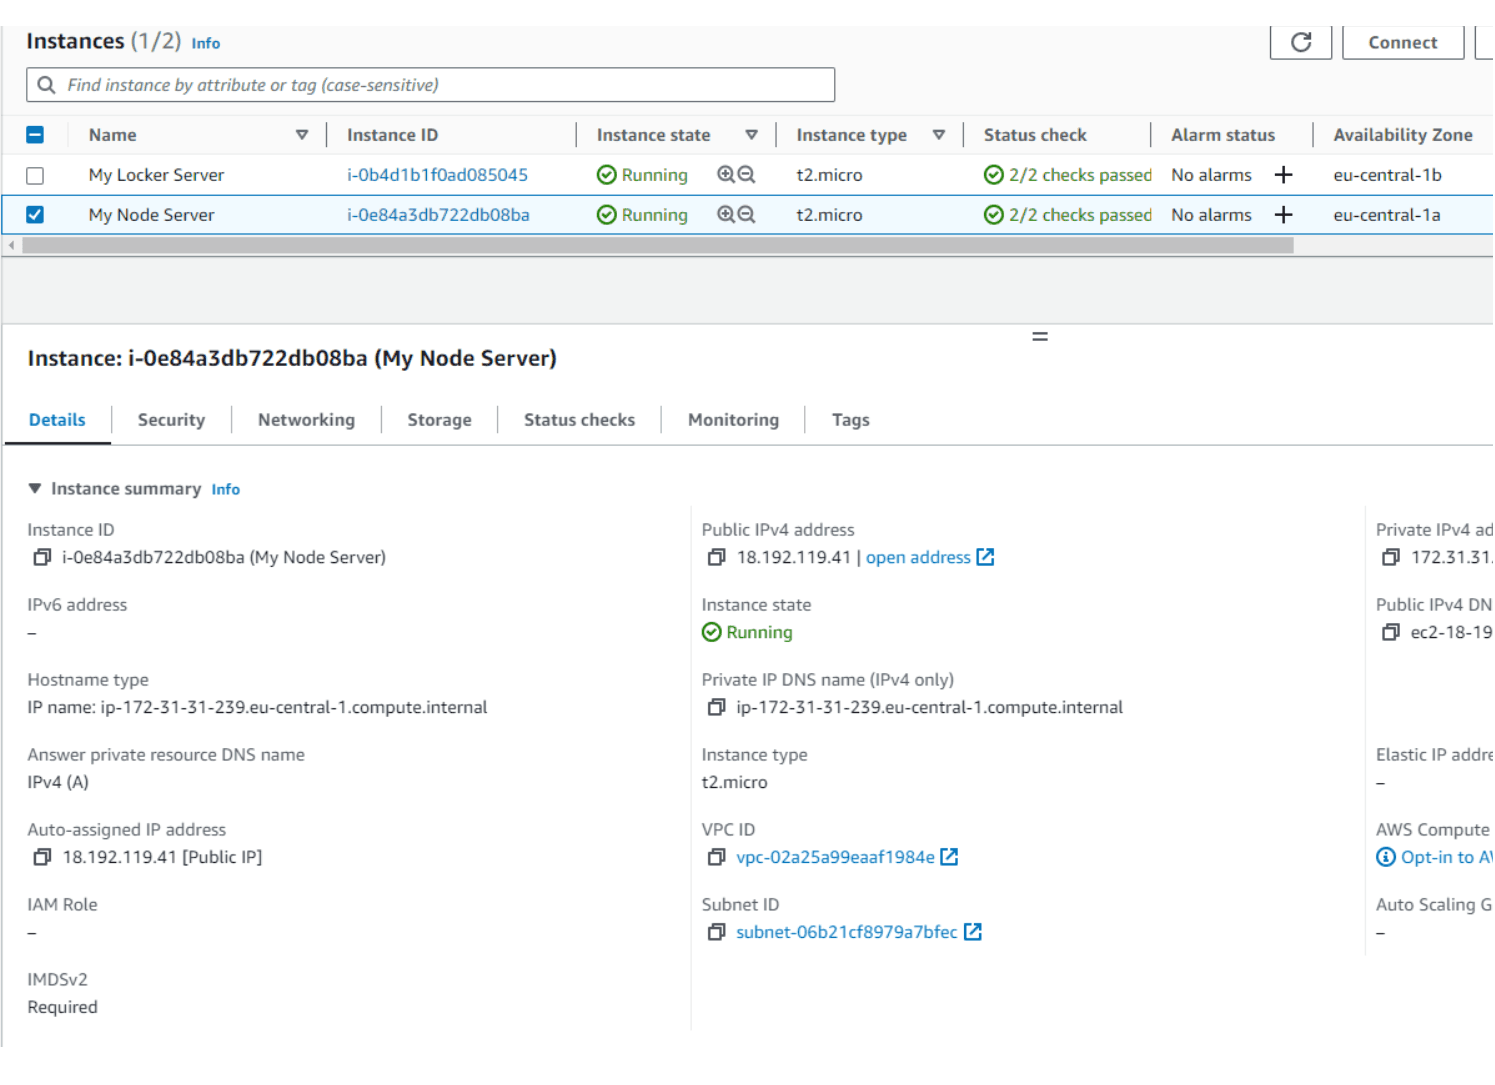
In my case I've got two instances , one that I created before, which is already up and running with Node.js server for my React Native Application. And the other one that we created today My Node Server you can see that Instance status is running, which is good, instance type is the one we chose.
In the Instance details and summary, you can find a plethora of information about your EC2 instance.
- Instance ID: This is a unique identifier for your instance. It's like your instance's fancy license plate.
- Instance Type: It tells you the size and capabilities of your instance. Is it a petite t2.micro or a beefy m5.4xlarge? The instance type holds the answer.
- Launch Time: This is the exact moment your instance came into existence. It's like your instance's birthday, but without the cake.
- Availability Zone: This reveals the specific region and data center where your instance is located. It's like knowing the exact neighborhood your instance lives in.
- Security Groups: These are like virtual bodyguards for your instance. They control inbound and outbound traffic, protecting your instance from any unwanted encounters.
- Key Pair: This is the virtual key that grants you access to your instance. It's like having your own magical key to the EC2 kingdom.
- Public IP: If you've allocated a public IP address to your instance, you'll find it here. It's like your instance's phone number for the internet.
- AMI ID: The AMI (Amazon Machine Image) is like a snapshot or blueprint of your instance. The AMI ID tells you which image was used to create your instance.
- State: This lets you know if your instance is running, stopped, or somewhere in between. Basically, it tells you if your instance is awake, taking a nap, or caught in a strange limbo.
These are just some juicy details you can expect to find, and if you like what I'm doing here for us and the community, just follow me on my LinkedIn profile LinkedIn. We will continue in the next episode, where we will actually be connecting to our EC2 instance and setting up the Node.js server. So stay tuned!
If you found this blog helpful, and you want to support my work, you can: BuyMeACoffee